Follow these steps to print your documents.
How to print
Tips for printing
- Save your file as a PDF.
- Don't print pages with long file names, eg web pages.
- Save your document onto the desktop or documents folder before sending to print.
Submitting a print job
From a campus computer
After logging into a UTS computer you can send your document(s) to print straight from the application you are using.
For example, using Microsoft Word:
- Click ‘Print’.
- The default printer selected will be either a ‘BLACK’ (black and white) or a ‘COLOUR’ (colour) printer, if either is available.
General Access Computer (GAC) or Lab Computer

Cloud Printing via MyPrint
You can send printable documents directly to the UTS Print Queue via a web page.

- Navigate to myprint.uts.edu.au
- Log in with your student ID number and password.
- Click Select files
- Choose your document to upload, and once uploaded wait for your document to finish processing.
- Go to any print release station or printer with an ID card reader to release your job.

Step 2: Attach the document(s) you want to send to Cloud Print Queue.
Step 3: Enter your security key into the subject line if you created one, and then send the message.
Step 4: Return to the MyPrint Web Portal.
Step 5: Click the ‘Current Activity’ tab and you will see your document(s) currently in the Cloud Print Queue.
Releasing a print job
Once you have submitted your print job you can release it from the Cloud Print Queue at a Print Release Station or printer with an embedded ID card reader.
Printer Embedded Release Station
Tap your student ID card on the card reader (if available) at the printer. Release your print job using the instructions and prompts on the screen.
Adding funds for printing
Recharging funds via MyMonitor Web Portal
Step 1: Login to MyMonitor using your Student ID username and password.
Step 2: Click on the Add Value button to begin adding funds to your MyPrint Account.

Step 3: Select the amount that you want to add to your account, or select ‘Other Amount’ and enter a value in the text box. (Minimum $5.00. Maximum $100.00.)

Step 4: Enter your credit card details, and click ‘Pay’.

Step 5: Once you have paid, your MyPrint account will immediately be topped up and you will receive a receipt, which you can choose to print.
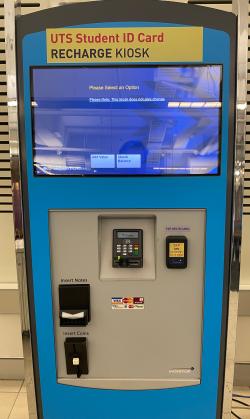
Recharging at a Recharge Station

You will need a valid UTS Student ID card and your bank card. Some recharge stations allow you to use cash.
Step 1: Tap your Student ID card on the card reader to log in.
Step 2: Follow the onscreen prompts to select the amount to transfer
Step 3: PayWave or insert your bank card to complete the transaction and take your receipt.
Recharge station location
- CB10.02.473
Need help?
If you need help with any of these steps or with your printing, please contact the Student Print Centre, the Digital Imaging Service or the IT Support Centre.
